Sunday, February 14, 2016

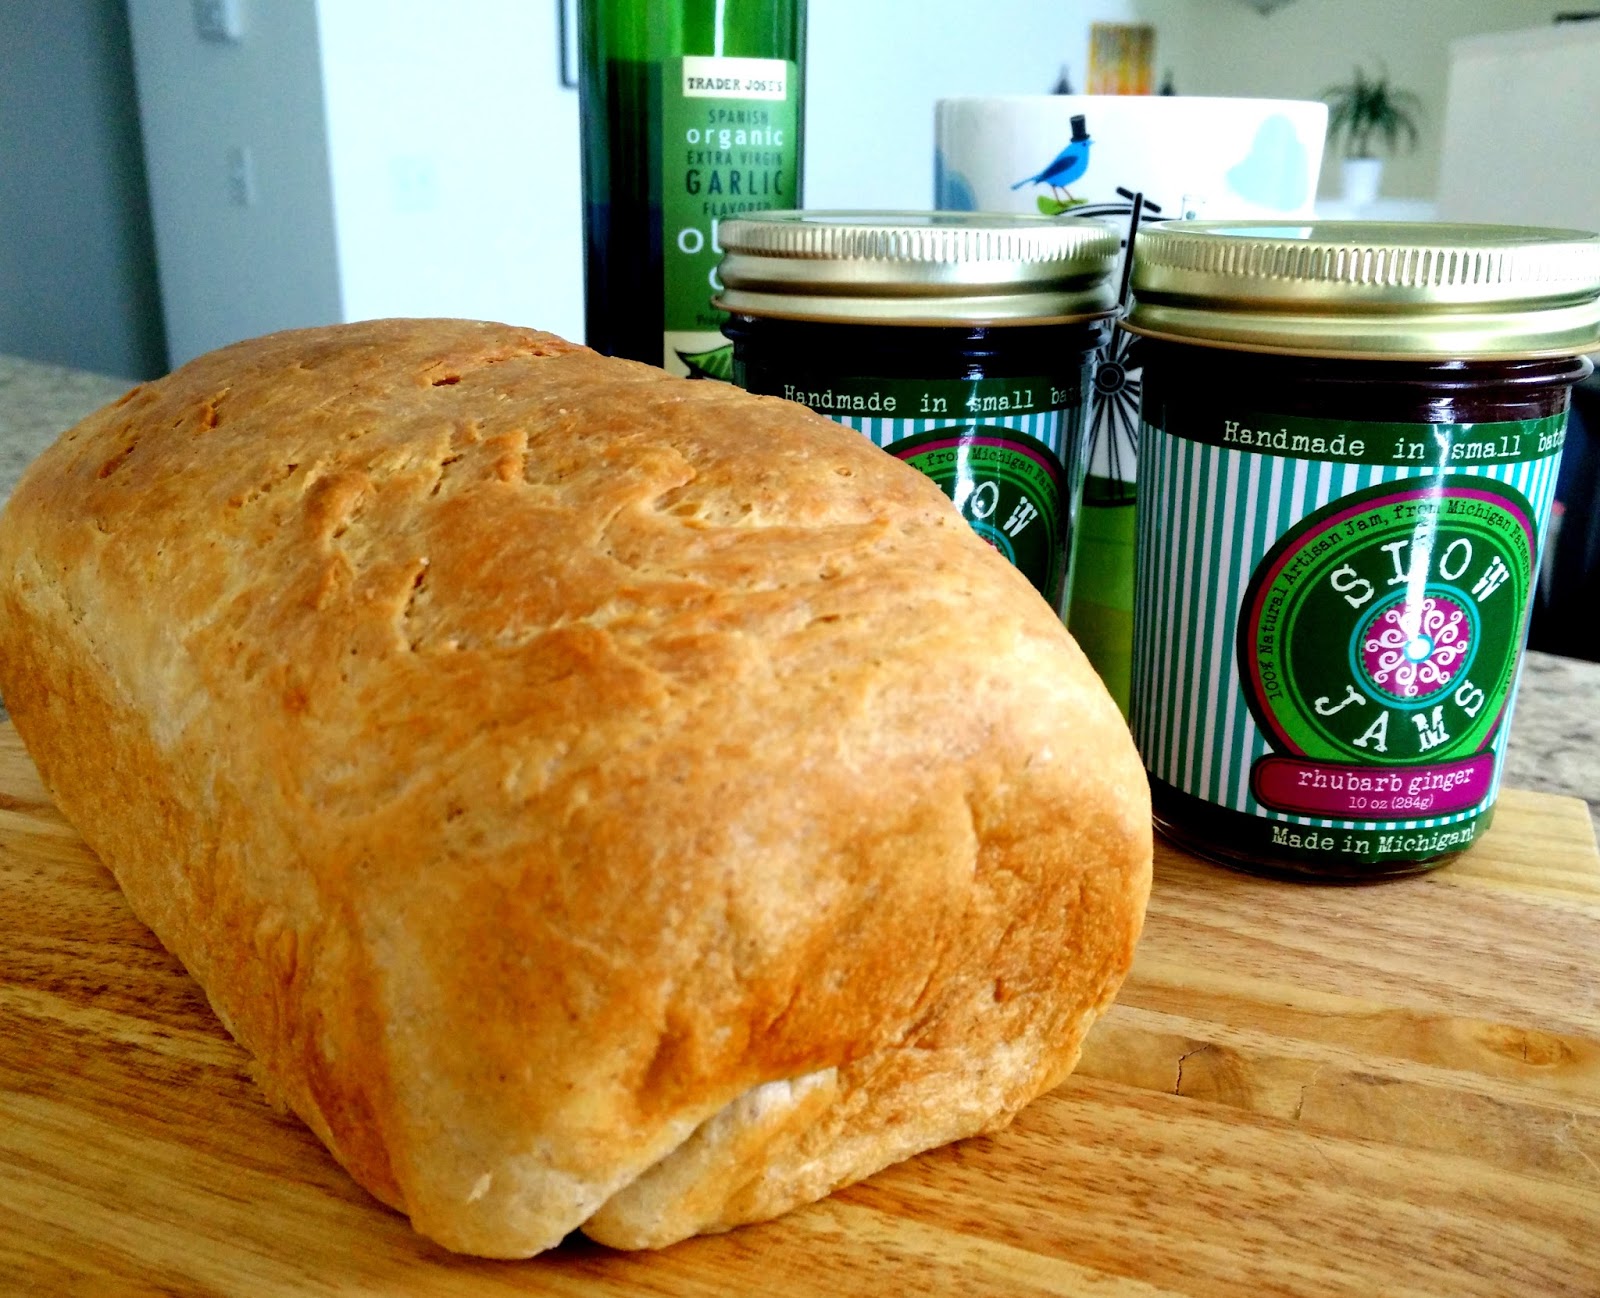
Whole Wheat Bread

Hello hello!!! I am back.... mostly for a short while because there's just a lot going on right now, and it gets tough for me to find time to blog. That has of course not stopped me from cooking or baking, rather the winter keeps provoking me to whip up scrumptious stuff and given my current weight I should actually be living off things like celery and green tea!

Anyway (she says conveniently ignoring the weighing scale) :P... We went to the Eastern Market in downtown Detroit last week. It is an awesome place to spend your Saturday and get some fresh local produce. I got some veggies and stuck to all the healthy stuff till I tasted these locally made jams! One sample and I knew I was doomed! They had amazing and unique flavors like Blueberry-Lavender and Rhubarb-Ginger (which I bought) I mean it was impossible to say no to these! They had jams like Tart Cherry, Spiced Apple, Red Hot Pepper to name a few.. very tough to choose a couple but let me tell you, the Blueberry Lavender - a must buy!!!

And these jams were what led me to baking the most amazing bread! See what I did there! lolzz trust me to turn anything into a reason to bake :P But seriously those jams deserve the effort of making a good loaf to go with! :)

Ok ok back to the bread, this post is not about the jam! though its sounding like it is!
SO ... I have tried some bread recipes in the past, mostly whole wheat and they have come out edible but nothing which will wow you. This time however I nailed it on the head! It is not a completely whole wheat bread. I have mixed All purpose flour and wheat flour (the regular atta most Indians use to make rotis). The reason why I used Atta is that the whole wheat flour we get in regular stores here is somewhat coarse, while the Atta is really fine ground which makes all the difference! I am planning to try a bread with only the roti flour but for now this is a keeper!!! And remember the most important ingredient in making bread is Patience! so here goes...

Ingredients

1 cup Whole wheat flour
1 cup all purpose flour
2 tbsp milk powder
1 tsp salt
1 cup water
2 1/2 tsp active dry yeast
1 tbsp honey
1 tbsp melted butter plus some more to brush on top.

Method

In a big bowl, mix all the dry ingredients.. Whole wheat flour, All purpose flour, Milk powder and salt.

In a separate bowl heat the water till it is lukewarm. You have to be careful about the water, if it is too hot it can kill the yeast. So exactly how warm should it be? Warm enough that you can stick your finger in it and comfortably hold it in... this works for me... I have never used a thermometer for the optimum temperature! To this lukewarm water add the honey and stir till it is dissolved. then add yeast, stir and cover the bowl. In about 10 minutes the yeast should have formed a froth and the water should be bubbly. If you don't see any froth, wait for another 10 minutes. If the water is still flat, it means the yeast is dead. You might want to start a fresh batch again with less hot water.

Now add the water with the active yeast to the dry ingredients and mix it up with a dough hook. You can knead by hand too but it might take longer and might be messy as the dough is quiet sticky. Once the dough starts coming together, add a tbsp of butter to it and knead into a soft smooth ball.

Now your patience is going to be tested!

Cover the bowl with plastic wrap or a damp towel and place it in the warmest area of your kitchen. If it is cold just heat your oven for 2 minutes turn it off and place the covered bowl in the oven. Make sure the oven is TURNED OFF. do not heat the oven for more than 2 minutes if you are going to proof the dough in it, you want the dough to rise, not cook!

After the dough has doubled in size (it takes about an hour for me) punch it down and knead it for 2-3 minutes. then shape it like a loaf of bread. To do this, I flatten out the dough with my hands and then roll it into a loaf shape. Put it in the 3*9 loaf pan. Now it is time for second proofing. Again, cover the dough with a damp cloth and place it in the warmest possible area of your kitchen. Avoid keeping it in the oven this time as you might want to pre-heat it for the actual baking.

As the dough once again rises to almost double its size, preheat the oven to 375 degrees F. I put a small oven dish in the rack beneath the one for the bread, with a little water in it, I found this helps the bread stay moist. Once the oven has pre-heated, put the loaf pan in and bake for 20 minutes. Now reduce the oven temp to 350 degrees F, brush some butter on top, turn the loaf pan to ensure even baking and bake for 20 more minutes.

By now you are on the last tether of your patience but..... wait for it! Take the loaf out and let it cool in the pan for 10 minutes and then on a rack till is is completely cool to touch! Try cutting a hot bread and you will have a hot soggy mess! so really... WAIT!

And that's it! enjoy your fresh bread any way you want! butter, jam, as a sandwich (so many options so little bread!! heheh)


Sunday, March 30, 2014

Microwave Chocolate Mug-Cake

I think I will begin this recipe with a word of caution... this one is Extremely Dangerous!!! only because how effortless it is to make... and when I say effortless, I really mean all the effort you will need, is to stir the ingredients with a whisk for a minute or so.

I usually like elaborate baking, but this is a recipe I turn to when I don't have enough patience even to pre-heat the oven but I still REALLY want to eat a chocolate cake.

Ingredients:
1/4 cup Semisweet Chocolate Chips (I use Nestle)
3 tbsp Milk (I use 2% or Skim Milk)
3 tbsp All-purpose Flour
1/4 tsp Instant Coffee Granules
1/4 tsp Vanilla Extract
1/8 tsp Baking Powder
1 tbsp Vegetable Oil

Method:
In a fairly large coffee mug, put the chocolate chips and add the milk to it. Microwave this for 30 seconds. Then whisk the chocolate and milk to a smooth texture. Now add the flour, coffee, vanilla and baking powder and whisk until mixed well. Then add the oil and mix that in. Put the mug back in the microwave for a minute. Insert a knife in the cake and if it comes out clean, your cake is done, if not put the mug back in the microwave for 10 seconds at a time till the cake is cooked. And that's it!!!

Let the cake stand for a minute or so and dig in! either with ice-cream, whipped cream, milk or as is!!!


Wednesday, July 3, 2013

Chocolate Lava Cake

Lately I have become an ardent fan of baking. And baking anything 'chocolate' is always welcome! The smallest of occasions is enough for me to pull out my mixing bowls, flour, chocolate chips etc n start experimenting. The problem is.... now I don't even wait for an occasion... at this rate I see another weight loss regime coming up in the very near future!! but lets not think about that now...

Lets talk bout whats been cooking in my kitchen... I think everyone I know absolutely adores the Molten Lava Cake you get in Chili's.... we do too... the problem is its too huge to finish aaand we don't always want to eat out and going all the way there just for desert is just too much work!!! On one such day I just thought of trying it out myself... none of my baking experiments have ever gone horribly wrong so I thought the cake will at the least turn out edible!! Plus Av is always up for experiments and the poor guy eats anything I make. SO... I made the cake just enough for two that day and now we will never go to chili's just to have that cake again!

Chocolate Lava Cake

Ingredients

2 Tbsp Unsalted butter
1/4 cup (heaped) Chocolate chips (I used the Nestle semi-sweet ones)
1/4 Cup Granulated white sugar
4 Tbsp All-purpose flour
1 Tsp Vanilla extract
A pinch of instant coffee granules (optional)
1 Egg

How To

In a Microwave-safe bowl, put the chocolate chips and butter and microwave on high for about 1 to 1 1/2 minutes. Check every 30 seconds, and if it is done, don't over-heat it.
Coat two small ramekins generously with butter and set aside. Preheat the oven to 400 degrees F.
Then add the sugar and coffee to the molten chocolate chips and butter and whisk till combined. Add the egg to this mixture and whisk till you get a smooth texture. Now add the vanilla and flour and whisk again... Do not over mix it!
Now, divide this batter equally between the two ramekins, place them on a baking dish and bake for about 15-20 minutes. When they are done the top usually looks cracked. It really depends upon your oven how much time the cakes will take to bake, so you might want to make the first attempt an experiment to gauge how much long you need to bake them to get that perfect gooey center with a nice cakey crust!

The cakes look like this when they are done. 


 Now after you get the cakes out of the oven, leave them in the ramekins for about two minutes to set, then loosen the sides with a knife and invert them into a bowl, add a big scoop of ice cream to the side n enjoy them piping hot!!!
Notice the gooey center!!! YUMMM!!!

Enjoy people!!!


Wednesday, May 8, 2013

Spinach Almond Pesto

I try to make almost everything at home.... from scratch!!! Not that I have to, I just love to. Challenging myself to make things I have never made and get them right the first time has become kind of an obsession, which needless to say Av highly appreciates :P And then to "encourage me" also keeps thinking of things I have never made before. As if i don't see the real motive lolz!!!!

Panini sandwiches are my go to dinner idea. Loved 'em the first time I had one and the next thing I did was get a panini press!!! They are super quick to put together and taste divine  Specially with a pesto. I had been avoiding making pesto for a long time now, just because I want to have at least few things which I don't make :P But on that fateful day... decided to make panini, got all the veggies I need and bread. I thought I had pesto in my fridge... I did... barely enough for half a sandwich **Sigh**

So finally I did make pesto at home and now there is one item less that I buy from the store!

Spinach-Almond Pesto

Ingredients:
A big handful of Cilantro .
A big handful of Spinach Leaves
1 Serrano Pepper (you can use any chili for that matter)
6 Cloves of Garlic
2 tbsp lemon juice
2 tbsp olive oil
1/4 cup Chopped Almonds (I use the blanched, peeled and chopped almonds)
1 heaped tbsp Grated Parmesan
Salt as needed
1 tsp sugar

The Process:
Wash the spinach and cilantro leaves thoroughly. Preferably the leaves should be very tender as the pesto is raw, and the tender leaves give a good flavor as opposed to a strong one which can be quiet overpowering.
Put everything except the Parmesan in a blender and blend till smooth. I keep mine a bit on the grainy side... I find this is a better texture for the pesto, but you are free to experiment!

Remove the pesto into a container and then stir in the grated Parmesan. You are ready to go!

The pesto stays for up-to a month in the refrigerator so if you don't use it all up at once, you can always save it for the next time. This recipe yields pesto enough for at least 8-10 sandwiches... and I am generous with my pesto :P


For the panini, I buy/bake a ciabatta bread. I spread some light cream cheese on both the slices of the bread and spread pesto over it. I dry-roast onions and bell peppers in a saute-pan, slice a tomato, put them in the sandwich and grill it in the panini press till the bread is a nice golden color on the outside.
Delicious and filling as is or with a cup of soup for a heartier meal!!


Enjoy!

Wednesday, February 27, 2013

Baked Corn Fritters

Hello People! I am back.... after another bout of laziness. Well not all laziness this time. A lot has been happening in life, days have got a lot busier than before. So this blog took a backseat for a long time... not that I didn't cook anything new for all this while... No!! that will never happen :D

But I was doing a lot more things trying out new stuff... also I could not decide upon a recipe to post at all....   And now I finally did!!! So here is a very simple recipe which I hope you will make and enjoy!!

(As promised before this time I actually have a good picture :P )


Ingredients:

1 cup. Steamed sweet corn
1 cup. Rice flour
2 tbsp. Besan
1/4 tsp. Baking Powder
1/2 cup. finely chopped spring onion
7-8 finely chopped mint leaves
1/2 cup. water
red chili powder, salt, sugar, cumin-cilantro powder as u want it... plus 1/2 tsp turmeric.

This will make about 12 medium sized fritters.

You will also need a big baking tray covered in aluminium foil. 

The Process:

Heat the oven to 475* F. Combine everything leaving aside the corn. Knead it a bit. Then add the corn and mix it into the batter. The batter must be thick enough to hold the shape when formed into patties, can be a little thinner, but not too much.) Form the patties, preferably thin, so that they cook all the way through in the oven. Spray the baking tray with some cooking spray, and bake the patties for 30 minutes turning once in between. Spray some cooking spray on each patty, to help them crisp up. Wait till they get a golden brown color. 
Done!! Serve hot with some chutney or ketchup!!!


Wednesday, July 25, 2012

Corn on the Cobb


Hello again, I am quiet late in putting up a recipe. But I have a very good excuse for it, we went to Seattle a couple of weeks ago and had the most amazing time with family!!! I was hung-over with the vacation for a looong time after we got back!! Twelve people in a house including 4 kids, we had a rocking time.... it so felt like home :) you tend to miss that a bit if you are a 24 hour plane ride-away from all your family. I met everyone for the first time and seriously it did not feel like I was meeting anyone for the first time... it was awesome. Bottom line.. I've got a cool family out here wohoooo!!!

Now let me talk about the food. In one week we had so much good stuff to eat, I am scared to even get on the scale to see how much I have put on... but I m sure at least 2 weeks of workout has gone down the drain :P. Amazing Biryani (I am still waiting on the recipe for that one), rasmalai, sheera, muffins, tiramisu... ooh I can go on and on! Plus Seattle has what I would like to call 'vacation weather' but it is permanent, its the kind of weather in which you constantly crave for chai n pakoras.

We did a last minute barbecue one day, and I wanted to make this Corn on the Cobb, but as we planned it last minute and it was the 4th of July, the stores were literally out of fresh corn! I couldnt make it there, so I thought.. let me at least write how I make it :) hope u guys like it...

It takes about an hour to make it.


Ingredients:

2 count Sweet corn on the cob.
1/2 tbsp butter (salted or unsalted)
1/2 tbsp olive oil
1 tsp lemon juice
2 medium cloves of garlic finely chopped
a small handful of cilantro finely chopped
1/2 tsp sugar
salt and black pepper powder to taste.

You will also need 2 square sheets of aluminium foil.


The Process:

Preheat the oven to 400 degrees F.

Clean both the corn, get rid of the husk and the silk. Don't cut off the stem. In a small bowl mix the rest of the ingredients together and microwave it for about 20 seconds. 

Now lay one corn diagonally on the sheet of foil, and brush the mixture on to it, coat the entire cob well and wrap it up in the foil. (while wrapping just fold the foil over the corn into a triangle and then wrap it around the corn... its a lot less messy to open n you can eat in the foil itself) Repeat this with the second one. 

Now put the foil covered corns in a baking tray n toss it in the oven for about 45 minutes to an hour... here, patience pays!!!

Open up the foil and dig in!!! Don't bother taking the corn out on a plate, You will miss all the flavor in the foil. :)


Delish!!!


Wednesday, June 27, 2012

Carrot Soup


As I mentioned before, I love to cook, I don't mind spending hours in the kitchen... but even for me, there are times when I need something hearty and really quick, or I am feeling just plain lazy and do not want to do  any or the minimal amount of cutting and chopping. So here is a recipe... actually my mom's recipe for a soup I make... hearty, filling, n quick...

You will need a pressure cooker and a blender.


The soup gets done in about 40 minutes :)


Ingredients

4 medium sized carrots,
1 medium sized onion
1 large tomato
1/2 cup rice (washed and drained)
1/2 tbsp oil
1 tbsp roasted cumin seeds, or just cumin powder will work just fine
1 green chili
2 cloves of garlic

The Process

Roughly chop the onions and tomatoes (big pieces are okay). Peel and chop the carrots into big pieces as well, just remove the core which is hard and may make the soup bitter (if the carrots have a thin and tender skin, you don't have to peel it off). Peel the garlic cloves and remove the stems.

In a pressure cooker, heat the oil and splatter the cumin seeds in it (if using the powder just put it in after the oil heats up.) then put in the onion and garlic, add some salt to it and saute it till the onions are slightly golden.
Now add the carrots, tomato, and the rice and mix it up. Add enough water to this and pressure cook (5-6 whistles should do it).

Open the cooker after all the steam has escaped. then Let the mixture cool down, then blend it and strain it into a saucepan. (its okay if you don't strain it) Add enough water depending upon how thick or thin you want the soup to be, add salt and pepper to taste, add a bit of sugar and if you want more spice just add some chili powder. Bring this to a boil and you are done... its all rich and creamy without an ounce of cream or butter!


Creamy Carrot Soup :)

Serve this with a few croutons, or eat it with just some bread and butter or a grilled cheese (yumm!!) and it makes a good lunch or dinner! I usually just have 2 big bowls of the soup and dinner is done!! :P


Sunday, June 17, 2012

Candied Bananas

" Do we have anything sweet to eat???" that's one thing I dread hearing after dinner! Because most of the time I have nothing sweet in-store.... not even a cookie. I don't have a sweet-tooth so it just slips my mind to get something sweet when I am out shopping (though my friends wont believe this given the amount of cakes n cookies I have baked over the past few months.. but hey, my hubby Loves sweet!)
Fruits are an option, but there are times when just fruits won't cut it, Avadhoot n I want a major sugar rush! So this is something quick I make. I used to make this dessert back in India for my dad, and it was his favorite, and it has become Avadhoot's favorite too!

It takes only about 15 minutes to make this one and I am writing the recipe enough for 2 servings, you can easily scale it up if you want more ... I would encourage guys to try this out too :P

Ingredients

1 Banana (not too ripe... or what the hell, take a very ripe one!! you will get all the gooey goodness!!!)
1 Tbsp Sugar
1 Tsp Butter (or u don't need to measure it out, just take a very small chunk of butter)
About 2 Tbsp crushed Cashews or Almonds or Walnuts... you can even use peanuts if you love them. (My personal preference is cashews or almonds.)
2 Tbsp Dark Rum (if you don't want to use it that's fine, tastes good without the rum too!)

Vanilla ice-cream to serve.

The Process

Cut up the bananas in half and then slice them up (not very thin though). In a small non-stick pan/skillet dry-roast the crushed cashews till they have a brownish tinge... don't burn them :P keep them aside in a small bowl. then in the same skillet, melt the small chunk of butter and coat the whole base of the pan with it. Then put the sugar in and stir it around till it caramelizes. After all the sugar is caramelized turn off the heat, stir in the sliced bananas till the caramel coats them, then add the crushed cashews. Do this really fast otherwise the caramel will start to harden. after mixing it up, quickly add the rum and mix it in.

And don't worry if it does not turn out to be exactly like the recipe, whatever happens it will taste good, I mean how can you go wrong with sugar bananas and rum!!!

Now get 2 bowls, and  put a nice scoop of the ice cream in each, and pour the mixture over the ice-cream. You can top it with some chocolate syrup if you want and then....Eat!! :)

Yum!!!

Its literally a 15 minute job and tastes Fantastic!!!!!


Friday, June 8, 2012

Healthy Chocolate Cake


Here is the first recipe from me.... opening with a healthy one :)

Before I start the recipe let me tell you that I don't come up with the recipes all by myself, that is I usually read about 15-20 or more recipes before coming up with THE one of my own which I feel will be perfect. Then I try that out and make adjustments. So here goes...

The cake will only take about an hour of your time, from prep to baking and an extra 10 minutes for it to cool down.


Getting Ready

Before you start baking get everything ready including the baking pan and a dishtowel to wipe hands, measuring cups/spoons, a big mixing bowl, spatula, your electric mixer (I have a Kitchen Aid 5-speed handheld mixer), or if u don't have one, just get a big whisk. And always always always, use the store bought measuring cups to measure out the ingredients when it comes to baking!

Ingredients

1/2 cup Whole wheat flour
1/2 cup All-purpose flour
3/4 cup brown sugar (or white sugar, whichever you have, just that brown is healthier)
1 tsp baking soda
3/4 tsp baking powder
1/4 tsp cinnamon powder (optional)
1/4 tsp salt
1/2 cup cocoa powder (I use Hershey's cocoa powder)
2/3 cup applesauce (get the original, no sugar added, unflavored version)
1 egg lightly beaten
1 tsp vanilla essence
1 cup shredded carrots/zucchini.... u can use both together as well just don't exceed a cup.
1/2 cup chocolate chips (I use Nestle Semisweet Mini Chocolate chips)
1/2 cup boiling water.... yes Boiling water :)

The Process

Preheat the oven to 350* F, and oil and grease a baking pan. (I used a 7 inch round pan. You can use any pan you have, just make sure that when you pour the batter in it it should come up to less than half of the pan's height, otherwise the cake will not have enough room to rise.) Also line the bottom of the pan with parchment paper, it makes it easier to take the cake out of the pan when it is done.

Combine and sift together in a large mixing bowl, flour, sugar, cocoa powder, cinnamon and salt.
Add the applesauce, egg, vanilla, veggies, and chocolate chips and mix to combine. Now just add the boiling water to this and mix till the batter is quiet smooth. Don't over-mix.

Now pour the batter into your greased and floured cake-pan, and bake for 30-35 minutes, till a knife/toothpick inserted in the center of the cake, comes out clean.

After the cake is done, leave it on the counter for about 5 minutes in the pan, and then loosen the edges and invert it on a plate, the cake should come out clean! then peel off the parchment paper from the base of the cake, and dig in!! or you can be patient and let the cake cool down and cover it with the frosting of your choice.

But neither my husband nor I can wait, so we just eat the hot cake with some Hershey's light chocolate syrup on top and a cup of milk :)

Looks something like this.. this is the scaled down version made in a ramekin.  (I promise to put a better picture next time :P )
You can double the recipe for a bigger cake or scale it down to make mini cakes in small ramekins, whatever works...

You can also add raisins instead of the chocolate chips... just an idea, I have never done it :) so if you do try it, let me know how that turns out!